
| Repairing a 2005 Daimler-Chrysler Sprinter Window Regulator Guide Roller |
by Ellsworth Chou |
(CAUTION: Electric window motors are powerful and window regulator mechanisms and internal door structures have sharp metal edges. These combine to make a hazardous environment. Be careful to disconnect electrical sources to the window mechanisms when working inside your doors.)
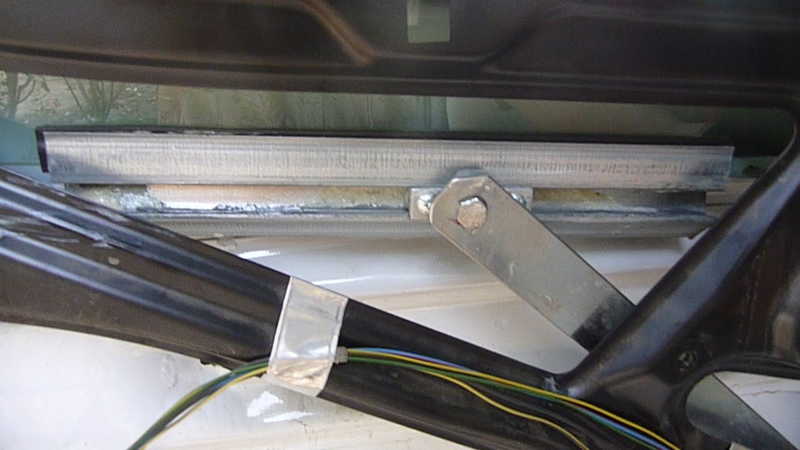
While on a road trip in August of 2014, the driver's side window of our 2006 Itasca Navion motorhome (with a 2005 Daimler-Chrysler Sprinter chassis) failed in the open position. Removing the door panel at our destination campsite revealed that the window regulator mechanism was missing what turned out to be a “guide roller” which locates part of the scissoring arms of the regulator as it moves along a steel guide channel which is bonded to the bottom of the window glass. I found remnants of this nylon? roller in the bottom of the door cavity.

Online research at the View-Navion Tech and Sprinter-Source forums revealed this to be a common failure, and that the roller - which rides on a shaft which is press fit into the regulator arm - was not available as a replacement part. The entire regulator is sold as a single assembly, with prices exceeding $300. I think the regulator itself is riveted into the door, requiring drilling/grinding out of the old rivets to remove the faulty part, and riveting tool to install the new.
Inspired by some of my online research, I mulled over my own repair design for the broken roller. Some forum posters reported some success with modifying replacement nylon/aluminum rollers made for shower doors, but several who had tried the modification reported that these parts failed after a short period of use, apparently inadequate for the forces involved.
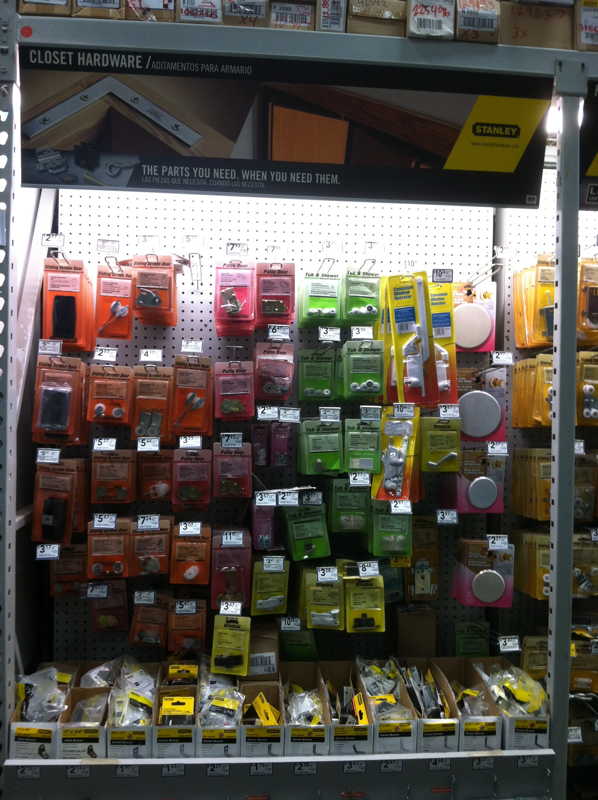
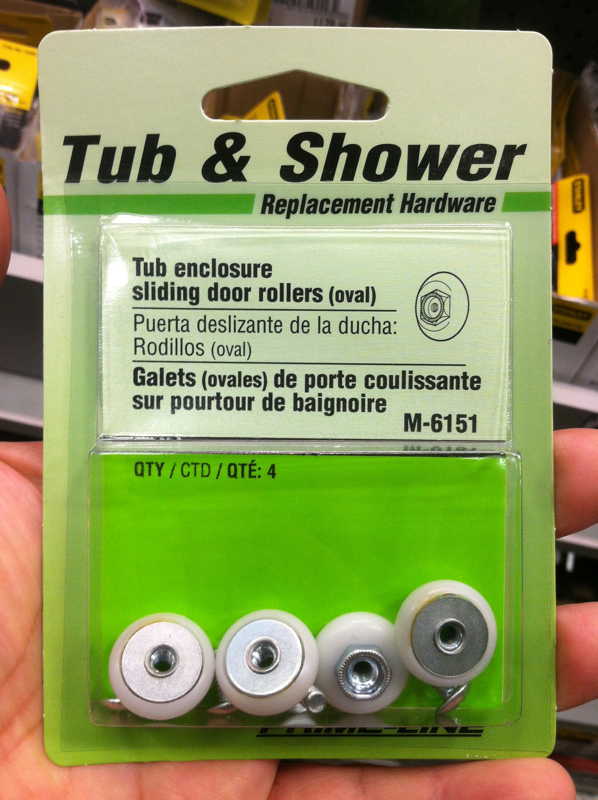
In my local Lowe’s hardware store, I located the shower rollers and purchased a few different models as options to use for development of a solution. The parts I eventually used were the Prime-Line M-6151, Shower Door Roller, 3/4", Plastic, Ball Bearing, Round Edge (here are current Lowe’s, Home Depot and Amazon links to the package of 4). The M-6151 rollers were too large to fit in the rail, so I ground the nylon down until it was a somewhat tight fit. I think I clamped the integrated nut into a small pair of Vise-Grips™ and gently ran the nylon roller at an angle against a Moto-Tool sanding drum running at the lowest speed, while trying to maintain a similar round cross-section of the nylon to fit nicely in the window's rail. Spinning the shower rollers with the grinding tool does risk damaging the bearing/bushing of the M-6151, so I tried to keep the angles between sanding drum and the roller fairly large, to minimize the roller’s speed

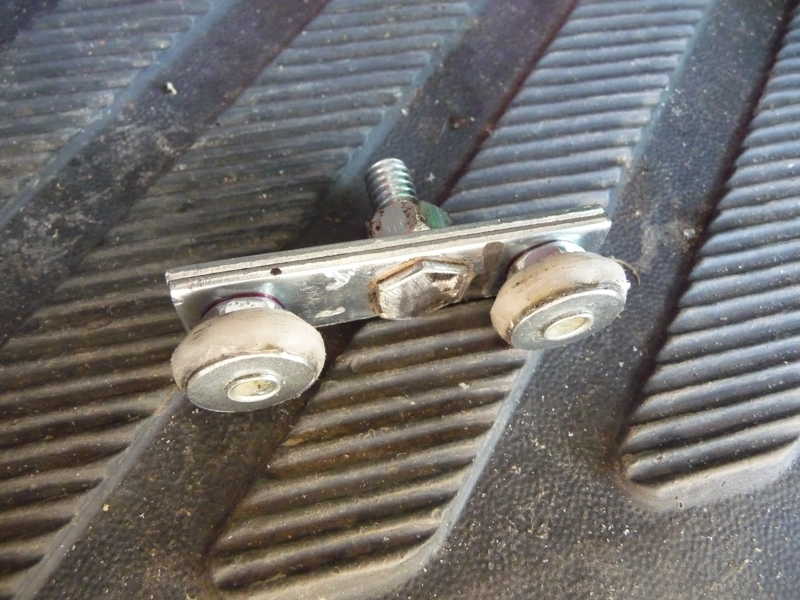
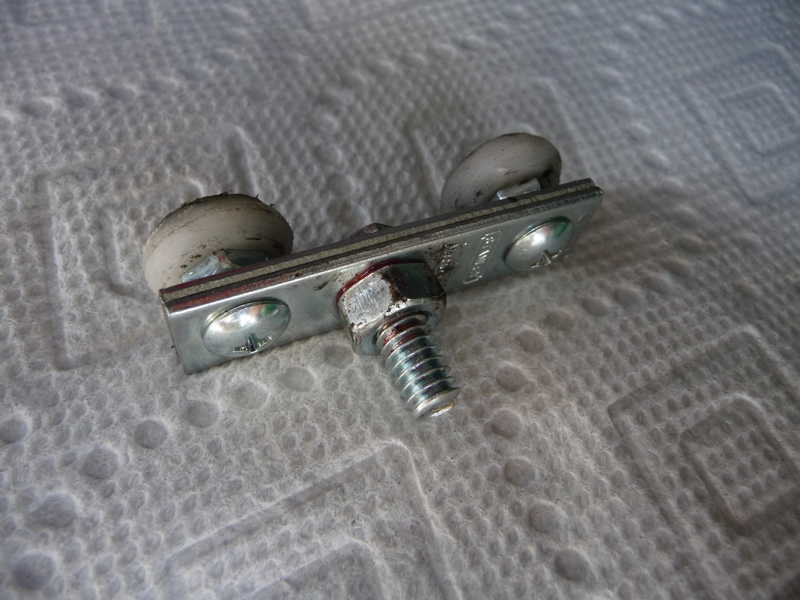
I spent some time thinking about how to fasten the modified shower roller to the regulator arm. The obvious approach was to run a bolt through the regulator arm (after grinding off the original roller’s axle pin) into the threaded hub of the shower roller. But I worried about being able to secure the roller, and there was still the problem that more than one Sprinter user experienced failure of these parts when similarly used. At some point, I hit upon an idea: I’d fashion a “truck” which carried two of the rollers, thus distributing the load across two pieces instead of one, and helping to turn the installation process into two separate phases: 1) sliding the assembled truck into the guide rail; and 2) attaching the truck to the regulator arm.
For the truck, I used a pair of something like these Stanley mending braces to minimize metalworking - they were the right size, and already drilled for two of the three holes I'd need. I used both pieces from the package for strength, and bolted two of the ground-down shower rollers through the existing holes in the mending braces, using a “permanent” thread-locking compound to secure the nuts and bolts.

I drilled a 1/4” hole through the center of the truck assembly and bolted a short 1/4”-20 bolt and nut (with more thread-locker) to form the axle which would attach the truck to the window regulator arm. The nut’s thickness works well as a spacer to prevent interference between the regulator arm and the heads of the two bolts which are holding the shower rollers.
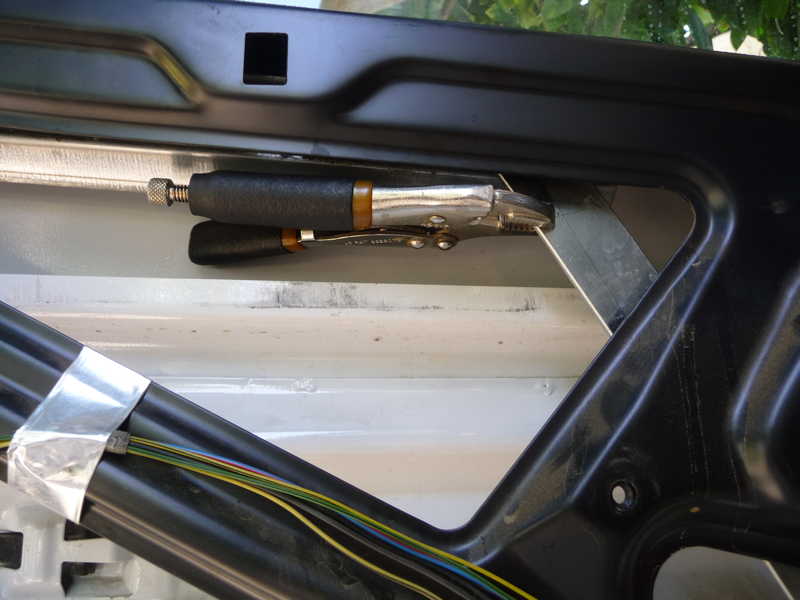
While working on the regulator, I used strips of duct tape to suspend the window from the top of the door frame.
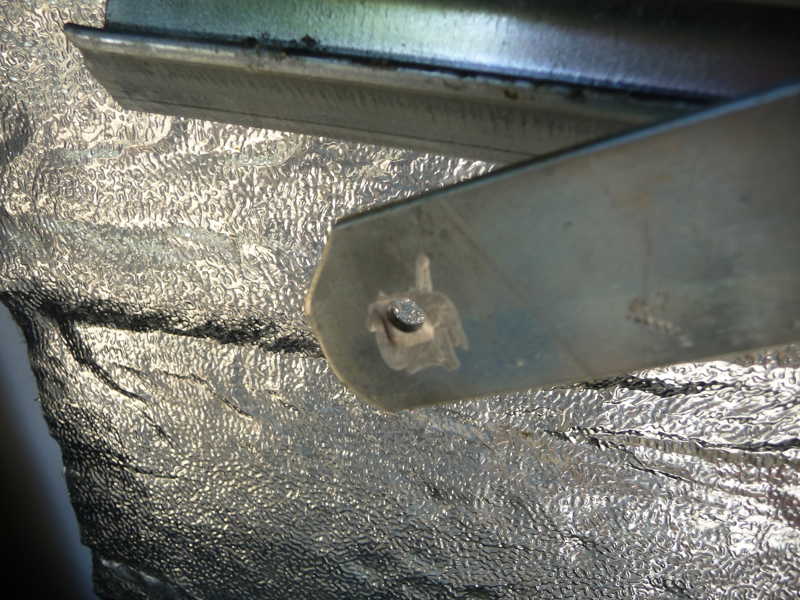
I used a grinding wheel to remove the original axle pin from the regulator arm on which the broken roller was mounted. This left a hole into which my new roller truck’s center axle would fit.
I slid the finished truck assembly into the rail channel (which is open at the latch edge of the open door), having applied a small amount of white grease to the channel. (This might actually be the wrong idea, lubricating the channel - as the tight-fitting rollers might simply slide instead of spinning, but I did it anyway.)
With a minor amount of bending of the regulator arm, I deflected it toward the inside of the door enough to admit the end of the roller truck’s center axle bolt into the hole previously occupied by the original guide roller pin. I finger-tightened a nut on the bolt, removed the duct tape supporting the glass, restored power to the window mechanism and cautiously test-operated the window, being careful not to hit any of the door or regulator parts with the protruding axle bolt, which still needed to be trimmed.
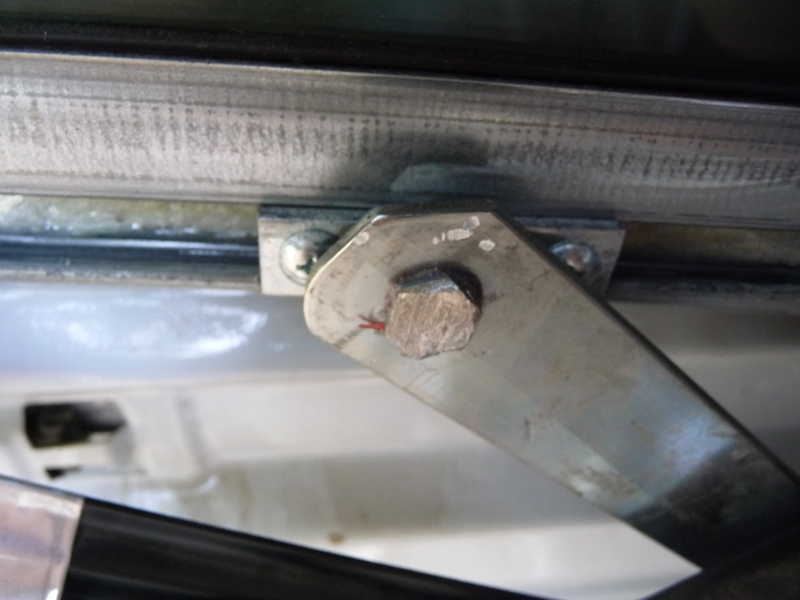
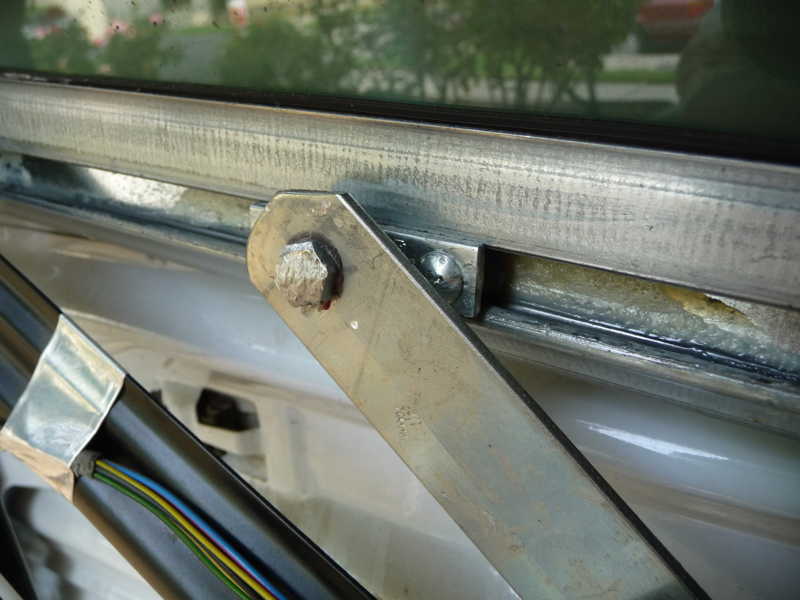
Satisfied with the operation, I attached the nut permanently with thread-locking compound, then sawed off the axle bolt flush with the nut. I had to further grind almost half the thickness of the nut to provide clearance from door and regulator frame work for the full range of travel of the regulator mechanism. This grinding also served to mildly weld the nut and bolt together, adding some additional confidence to the join.
It’s been two years since this repair, and the window is still functioning. We haven’t used the Navion as frequently as some RVers during the same period, so I can’t vouch for the durability of the modification with lots of use. But if the modification fails, I think I’d still repair the truck and go another couple of years - not so much because of saving the cost of a new regulator, but because it’s a shame to replace the huge mechanism because of the failure of such a small component.

 |
All contents Copyright 2013-2023 Ellsworth Chou |