
| Adding Auxiliary Audio Input to the Clarion DXZ445 Radio in a 2006 Itasca Navion |
|
by Ellsworth Chou
|
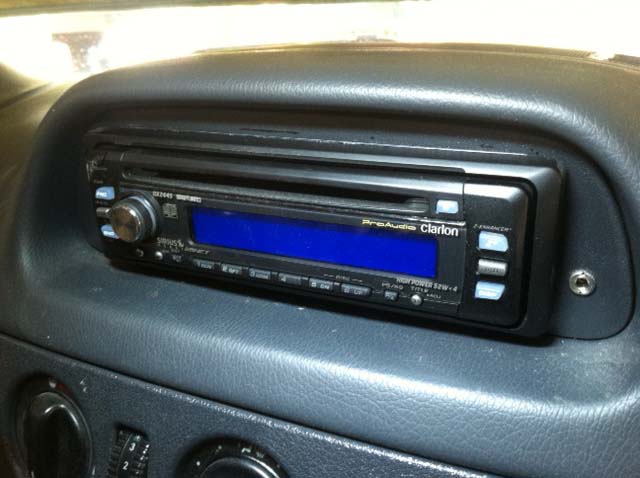
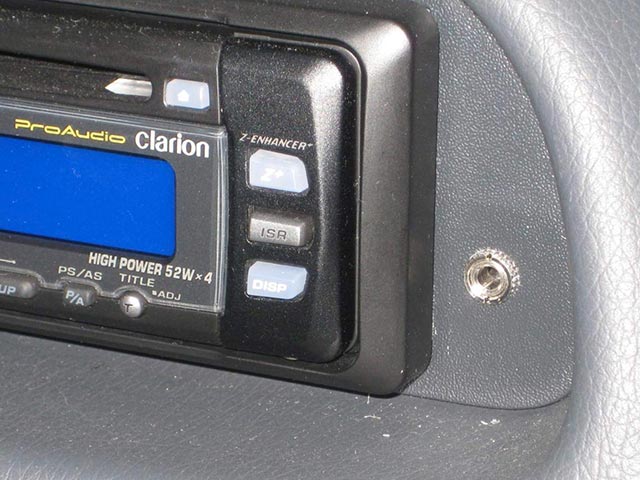
If your Clarion radio looks like the one pictured here in our 2006 Navion . . .
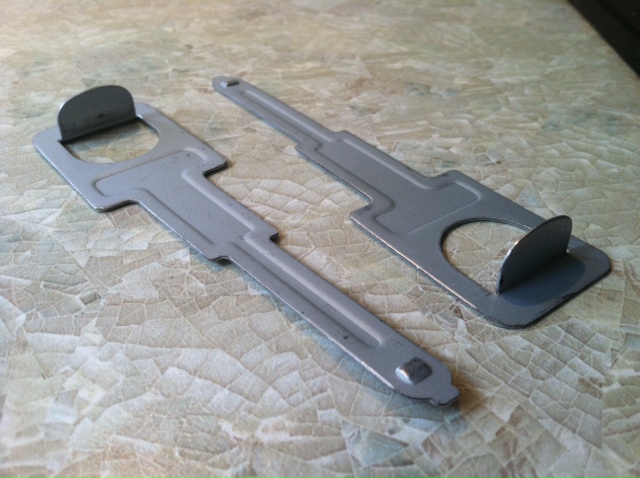
. . . then these are the radio chassis extraction tools.
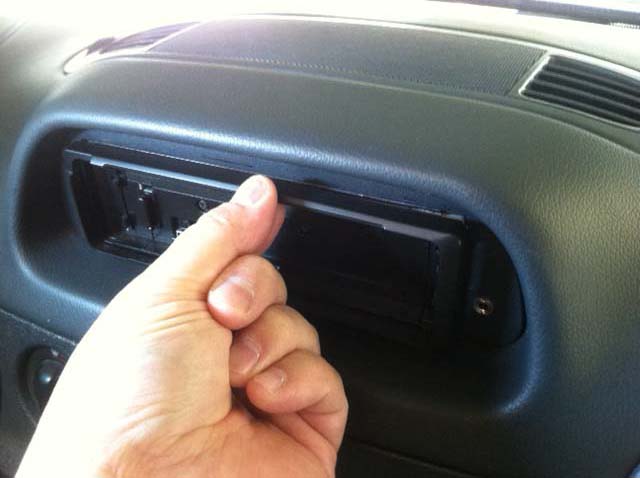
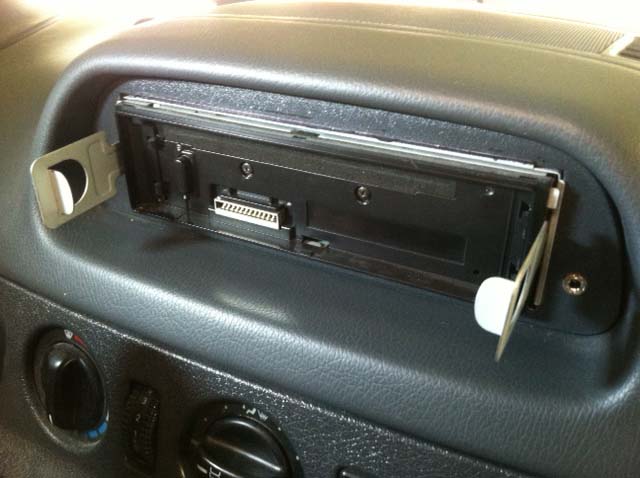
To use the tools, first remove the radio's removable faceplate by pressing the release button at the upper-left corner of the faceplate. Then gently lift up on the center of the plastic bezel to release a tiny molded barb:
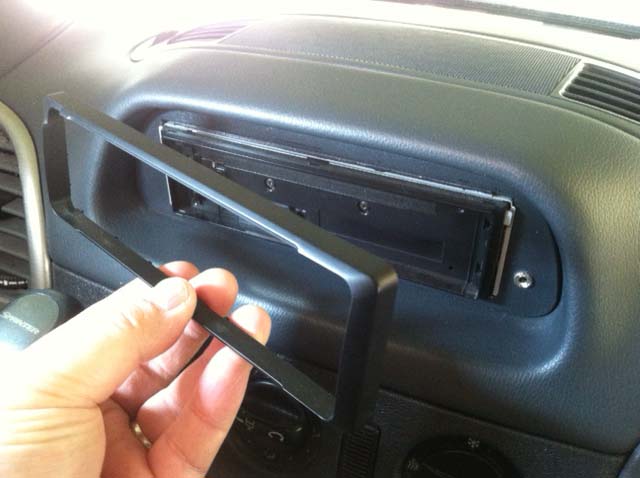
. . . and pull away the bezel at the top, after which the bezel is free to pull away at the bottom.
Note that on the long thin end of the extraction tools there is a small barb stamped into the metal. This will engage an opening in the chassis side. Now insert the extraction tools between the outermost two metal shells visible on the right and left margins of the radio chassis. with the tabs in the finger holes both pointing inward. Insert the extractors until the wide part of the "key" shape reaches the front of the chassis, then pull gently back out until you feel the extractor's barb hook onto the chassis. If you don't get it at first, just try again by pushing the extractor back in and pulling it out.
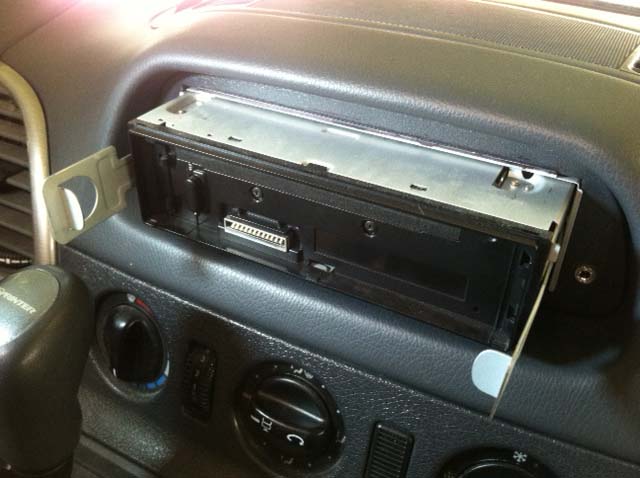
When you feel both extractors have caught, pull with even pressure on both tools and the chassis will slide out of the frame in the dashboard. Cables will be attached to the chassis, so you'll need to guide them out and disconnect the cables (if that's part of your goal) to completely free the radio chassis.
CONNECTING A MEDIA PLAYER TO YOUR CLARION RADIO
Your radio has a pair of "RCA phono" jacks - just like the ones on the back of your home stereo, with (I think) red and white color-coding to identify left (white) and right (red) audio channels.
THE SIMPLE SOLUTION
The simplest solution at this point (which requires no soldering at all) is to connect a cable which has stereo RCA phono plugs (male) at one end, and a 1/8" stereo phone plug (male, and note the difference between "phono" and "phone" terminology) at the other. The 1/8" stereo phone plug is the familiar connector on every earbud/headphone that plugs into MP3 players. So you could just plug the RCA plugs from the cable into the RCA jacks in the radio chassis, fish the wire either around the radio bezel, through a hole you make in the faceplate surround, or just drop it down under the dash to emerge around the footwell somewhere. Here's some cables from Radio Shack (which I use only because it's a ubiquitous source, and you can ask for the part number) which would be appropriate to the task:
MOUNTING AN AUDIO JACK IN THE DASHBOARD (requires soldering and ability to identify wire conductors relationship to plugs)
I chose a somewhat more complex solution, essentially taking the RCA phono plug end of a cable, and soldering its wires to a chassis mount 1/8" stereo phone jack. There are two layers of plastic which form the surrounding area of the dashboard in which the radio chassis rectangular opening is cut. The outermost is a decorative grey (in our case) plastic piece, and under it is the Sprinter's plastic dashboard material.
PARTS LIST (using Radio Shack parts at a universally-available reference)
To mount the phone jack in this surround area:
When you're using an audio-playing device, you'll want to adjust its output level (volume) to as high as possible without causing distortion. In some cases, this might be full-volume. For some devices, full volume with cause some noticeable distortion, so turn down the volume until the distortion is no longer audible. Doing this will minimize the amount of amplification noise you experience when listening, and also avoids the shock of switching to another source (radio, CD, satellite, etc.) and discovering that you'd turned the radio amplifier up to full blast because the audio player level was low. It's certainly OK to adjust the volume with the audio player (especially to avoid the long reach to the radio volume knob for both driver and navigator), but try to keep the output on the audio player on the high side whenever possible. (Note that this will use more power on the audio player and could drain its battery faster, but we always keep them plugged into external power.)

 |
All contents Copyright 2013-2023 Ellsworth Chou |