| Installing a Backup Camera in a 2006 Itasca Navion |
|
by Ellsworth Chou
|
(This document began life as an email response to a fellow user of the Yahoo! View-Navion Tech group, an excellent community of owners of these adventurous Winnebago motorhomes, and an invaluable resource for any Winnebago View or Itasca Navion user.)
When we bought our Itasca Navion from the original owner, one of my first projects was to remedy the lack of backup camera system. This web page represents some of the process (but is far from comprehensive) of installing an inexpensive aftermarket camera system, using an existing wiring harness already installed in the chassis during construction by Winnebago.
NO CAMERA, BUT CABLING ALREADY IN PLACE
Our 2006 Itasca Navion was not originally equipped from the factory with a backup camera or monitor. However, I would learn from members of the View-Navion Tech group that there was an existing multi-conductor cable apparently installed in every View/Navion by Winnebago (a common production strategy for many products). This addressed the most awkward part of installing a camera myself: running a cable from the cab of the vehicle to the outside. (As I write this after having done a great deal more modification work on our motorhome over the past three years, it occurs to me that running my own cable under the vehicle and up inside the grey plastic trim on the rear of the vehicle might not be that bad.)
However, I also knew that it was unlikely that there would be connectors at the ends of the cable which were compatible with whatever camera and monitor I purchased (this turned out to be true).
I purchased a no-name backup camera system for $215 online. It included a 7" diagonal color LCD display, cabling and color camera with built-in infrared lighting (which turns out to be a terrible - more about that later).
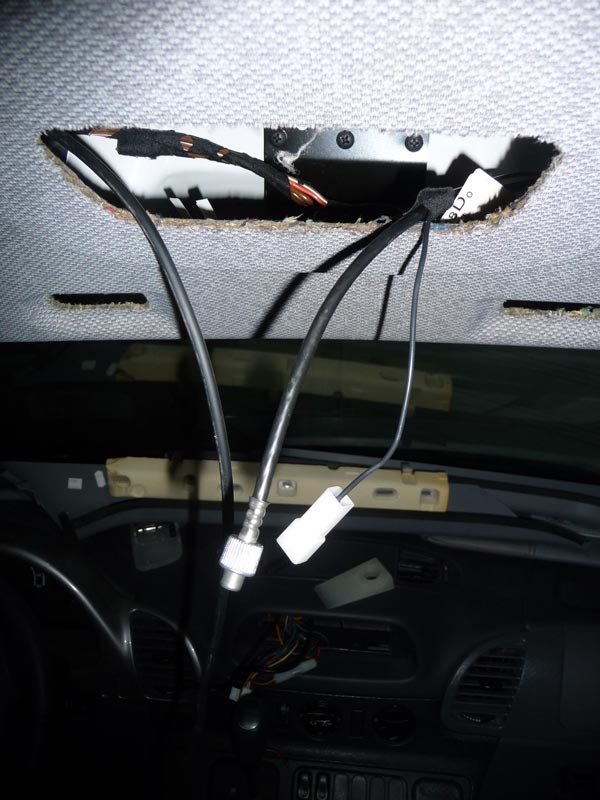
At the front of the motorhome, the factory harness is coiled up inside the headliner over the cab. At the rear, the cable terminates inside the plastic (dark grey in our ‘06) trim which frames the top of the exterior rear bodywork of the coach.
INSTALLATION NOTES
It’s been a while, so some details are fuzzy in my memory, but here are some notes from my installation:
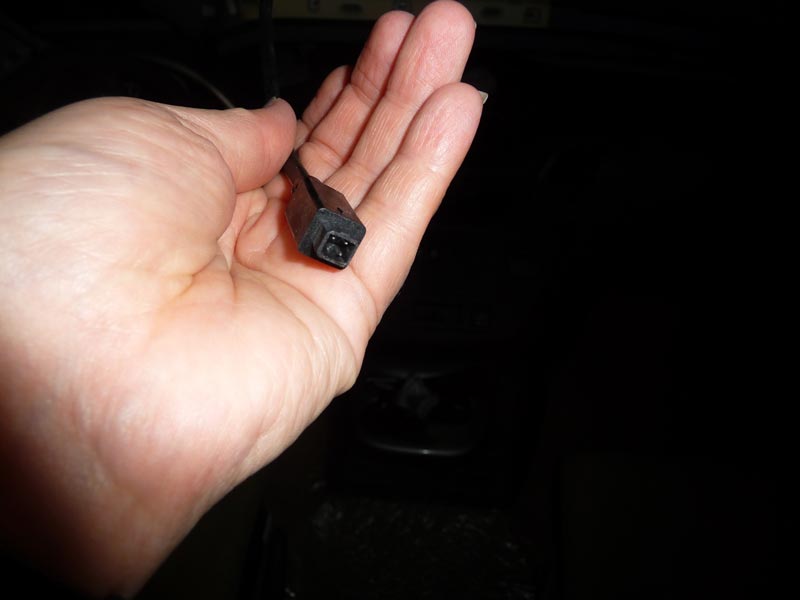 |
Winnebago monitor-end cable connector |
- I was able to fish out the camera end of the Winnebago cable pretty easily, without removing the plastic trim panel which covers it. This trim panel is located at the top of the rear exterior of the motorhome, running the full width of the vehicle. I was able to pry the gap between the bottom of the trim panel and the bodywork enough to access the cable, which was in a loose loop under the trim, about 1/4 of the way from the left end. Here, too, I lopped off the original Winnebago connector and spliced in the connector for the aftermarket camera, matching a chart of the color codes I’d made from the other end of the cable. I’ve pulled out the camera cable in the photo below so you can see where it’s routed.
- NOTE; If you've never done any soldering work outdoors, note that any amount of wind can drop a low-wattage soldering iron tip below the melting point of the solder. You may need to wait for the wind to subside, build a wind break (you could just tape some pieces of cardboard around the work site to block direct wind), or use a higher-wattage soldering iron.
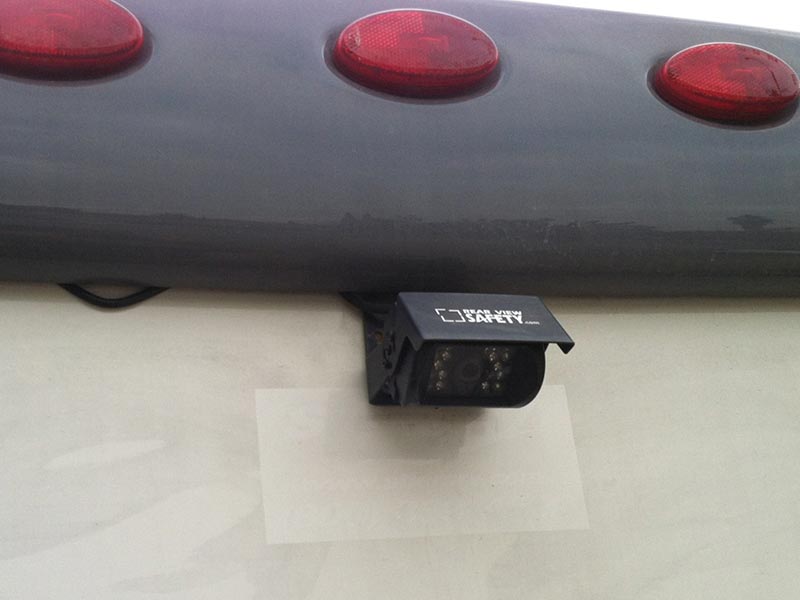 |
Original Winnebago camera cable was hidden behind top-rear trim panel; I've pulled out a loop of cable to show its location |
- Squeamish about putting more holes into the bodywork (and not knowing exactly what was behind), I was excited to discover a factory mounting hook/clip for the plastic trim panel directly in the center. I fabricated a steel bracket to which I riveted the camera yoke, and my bracket slides up under the trim panel and hooks over the factory mounting hook. A piece of aggressive outdoor foam mounting tape keeps the rig from tilting/creeping, and is very solid. I'm happy to have avoided punching a hole in the exterior skin of the Navion.
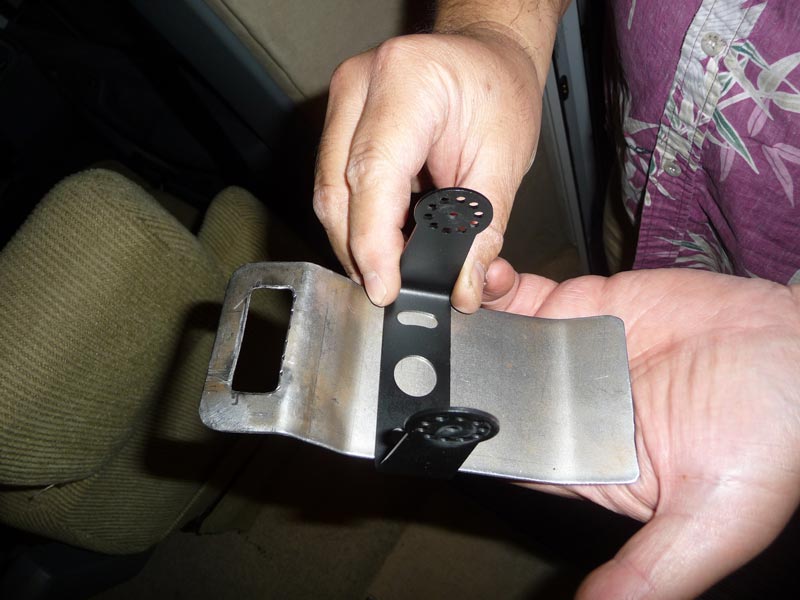 |
I fabricated this bracket to hook over factory trim-mounting clip without drilling any holes in motorhome |
- The aftermarket camera system I purchased has a terrible design feature: it has built-in infrared LED illumination, but this is located behind the same piece of weather-resistant glass as the camera. So when it’s dark enough for the LEDs to automatically illuminate, the glare from the inside of the glass and from the inevitable dust and grit that collects on the outside renders the view nearly unusable.
- DISABLING THE LEDs: After putting up with this for two years, I finally took the camera apart and discovered to my delight that the LED panel was connected via a plug into the camera’s circuit board. I unplugged it, and continue to enjoy the result. The camera’s low-light sensitivity is quite good, and between backup and tail lights (which emit LOTS of energy in the red end of the spectrum to which these cameras are most sensitive), there’s nothing you can’t see. So far, my intrusion into the O-ring sealed camera glass hasn't admitted noticeable moisture, but I'm staying watchful for telltale signs.
- Just because I thought it would be nice to have, I powered the backup camera/monitor system from the circuit fed by our Navion’s Radio Power switch. This lets me optionally turn on the camera without the ignition, in case I’m curious about what’s going on at that end of the vehicle without the engine running. When the switch is in the normal “Engine” position, the camera/monitor turns on automatically with the engine.
- NOTE: Our camera/monitor includes a sound system. While this is useless while rolling down the highway, the system has enough fidelity that you can comprehend speech at a conversational level from someone standing behind the vehicle. Again, not particularly useful, but I thought I'd mention it. If you find yourself one conductor short in your particular wiring scenario, I see no particular reason to prioritize audio.
- Our particular monitor turns out to be a little too bright in the darkest of driving conditions, creating a glaring light source that competes strongly with the view out the window and of the instrument panel. Though there’s a brightness control on the monitor, it’s doesn’t actually change the overall brightness of the display, acting more like a “contrast” control. So I’ve carried around an old piece of neutral-density gel (a dark grey plastic film used to attenuate light levels from film/video light sources) rigged with a rubber band to slip over the whole monitor. Ugly and stupid, but it works. The need for this has been greatly reduced since disabling the LED lighting in the camera, because that caused an overall white cast in the entire image when conditions were darkets, but it's still something I wish I could control. I have little expectation that any other system would behave differently - dimming of the "backlight" source in LCD monitors tends to be reserved for high-end products.
- My choice for camera angle was to tilt down until I could see all the way up to the actual bodywork, without actually shooting the tail light lenses. The camera has a wide enough lens that I can see both “bumper” corners, and the spare tire and ladder are in the shot. I can thus park with fantastic precision - within inches of contact with the spare tire is possible. However, the shot is NOT tilted up enough to then use the camera as a typical rear-view mirror. I can only see the road surface up to about 30 feet aft of the Navion. This means that when I use the camera for passing, I have to watch the target vehicle pass out of view and a bit further before merging back in to make a courteous pass. I still like my choice of prioritizing the lower angle for parking/reversing. I’ve considered running a second camera with a normal rear-view shot. The monitor supports multiple video sources, and for most driving I’d leave it as a typical rear-view, and switch it for parking. But this would entail running a new camera cable from front to back, which is what we’re trying to avoid in this document.
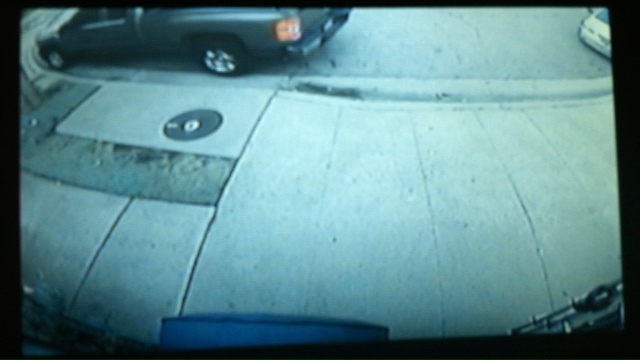 |
Final camera viewing angle provides very precise parking reference, but very little range as rear-view camera. |
RESULTS
It's great! I park with absolute confidence in the location of the rear of the vehicle (and I'm willing to try an park almost anywhere, especially in urban conditions).
After finally ridding myself of the horrifically bad built-in infrared LED system, the only thing that's less than perfect about the imaging is that I wish the display could be further dimmed for the darkest driving conditions.
I'd like an additional level camera shot to behave as a virtual rear-view mirror. Some day, perhaps I'll rig a second camera for this purpose and connect it to the secondary input on the monitor.
NAVION MODIFICATION/SOLUTION PAGES
Navion Modification/Solution Pages Home
CONTACT
- Visit my Useful Bulk blog for useful information about all kinds of things.
- If you have a question specific to this project, feel free to

- If you discover or create a solution that might help others, please contribute it to others on the Web. That's what it's for.

|
All contents Copyright 2013-2023 Ellsworth Chou
|