![]()
| Converting to Compression Pedal-Return Springs on Act Labs Performance Pedals for Racing Games |
|
...and never break a pedal spring again
|
| Updated 4/26/05 - Dual-Pedal Spring Modification! |
| Now with accelerator and brake pedal springs |
| This page contains some images and notes of a modification I made to utilize long-lasting compression springs in place of the poorly designed failure-prone springs in Act Labs Performance Pedals. (As of some time in 2004, Act Labs no longer sells this product.)
This is not a set of instructions, but a loose photojournal of the final results of the fabrication for the throttle spring. Unfortunately, I did not take the time to document the process - this was originally a prototyping effort, and went through some changes from concept to the final working stage. The final result isn't particularly well finished aesthetically, but works very well for my purposes. In some photos below (without the blue backgrounds), you can see the orignal prototype which only had a throttle pedal modification. The final version features modified throttle and brake springs. If you decide to undertake this task, it can be accomplished in many ways. This is neither the hardest, easiest, quickest or best approach - it is merely the one which evolved as I designed it. Hopefully, this will inspire you to engineer a similar mod to your own pedals. Best of luck. - Ellsworth (click on any images on this page for larger image) |
| Contents |
|
My original throttle spring broke after perhaps 6 months of intermittent use of my "Old Style" (2 springs per pedal) Act Labs Performance Pedals (ALPP). This happened not long after I noticed many online references to short the spring lives of the ALPP. Though replacement springs are available from Act Labs (for now) and the replacement procedure isn't terrible (it's not a trivial process, however), my second spring breakage convinced me to go through with fabricating this solution. The original Act Labs springs put all the pedal travel through bending just two coils of wire - perhaps less than four inches of spring steel doing all the bending. My converted spring uses at least 14 coils - putting all those throttle cycles through over two feet of spring steel. Fatigue-based failure should be eliminated.
(6/1/04: I just discovered that Act Labs now makes the Performance Pedals with a single spring design, which they refer to as "New Style." They also have instructions for modifying the Old Style pedals for use with New Style springs. However, my design still subjects the spring to far less fatigue over time, so I'm not inclined to convert back to their system at this point.)
This was accomplished primarily with common hand and power tools. I'm not a professional metal-worker, but have done quite a bit of fabrication for small personal projects. I don't have a proper metal-working shop, and lack many useful large tools (band saw, drill press). On many projects, including this one, I end up with less-than-perfect precision, partly due to limited tools, partly to lack of real training in the craft. However, I typically allow for this in my long planning process.
If you're handy with working metal, you might be able to accomplish this. If not, perhaps you have a friend who can help.
Parts List (not comprehensive)
(I'm documenting this some time after construction, and I did not take notes at the time, so this is a rough list at best.)The Compression Spring Assembly (click on any image to enlarge)
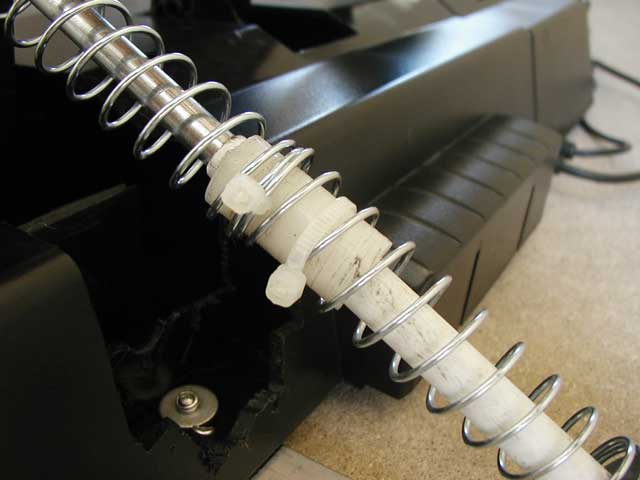
Using a long compression spring requires some method for guiding the spring (I've used compression springs as throttle return springs in real cars, because if a tension spring breaks, a throttle stuck wide-open can be very exciting). I chose to internally guide the spring (as opposed to encasing the spring in tubes, like a toilet-paper spindle). After much experimenting and measuring of available materials, I ended up using a Bic "Round Stic" pen body tube as a guide tube for the 1/4" eye-bolt guide shaft. This is actually a pretty good solution - just enough stiffness to keep the spring aligned, and a nice natural lubricity that keeps the steel eye-bolt shaft quietly sliding.
 |
 |
|
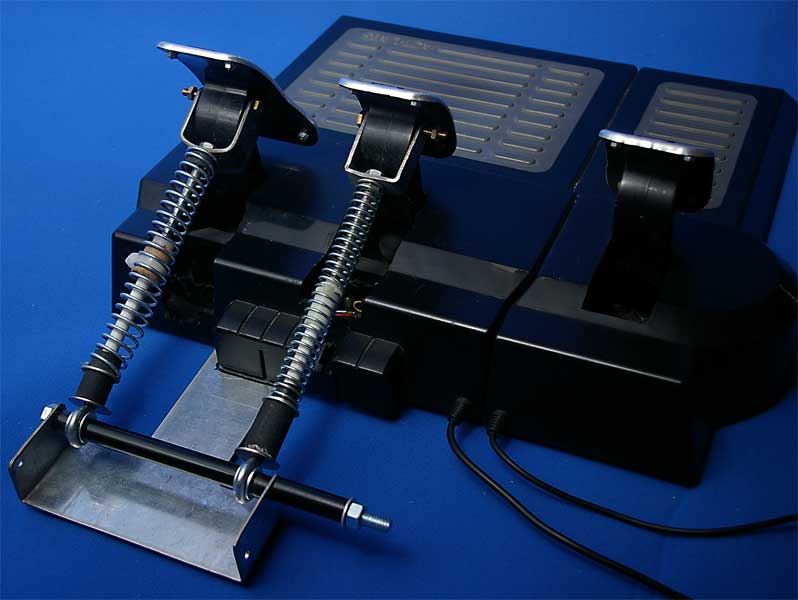
compression spring assemblies, lower mounts, and bracket
|
underside of bottom spring bracket
|
If you look at the photographs above, you can see the final assembly. It was tricky working out the appropriate geometries and lengths for all the parts. The guide shaft has to travel the full stroke of the pedal without "stacking" the spring, hitting the guide tube's end or the pedal base itself. The spring needs to have some "pre-load" at the full up position of the pedal, to provide some resistance and ensure that the throttle is completely closed. The black cylinders visible between the washers at the bottom of the spring stacks are pieces of fuel hose used to help preload the springs - without them, the throttle and brake pedals would sometimes fail to to return to full top position.
The enormous holes cut in the black plastic base (below left) are cut as a relief for the spring/guide assembly and the yoke. With more careful fabrication of the yoke, the holes could have been smaller.
 |
 |
|
detail of relief cut from base
|
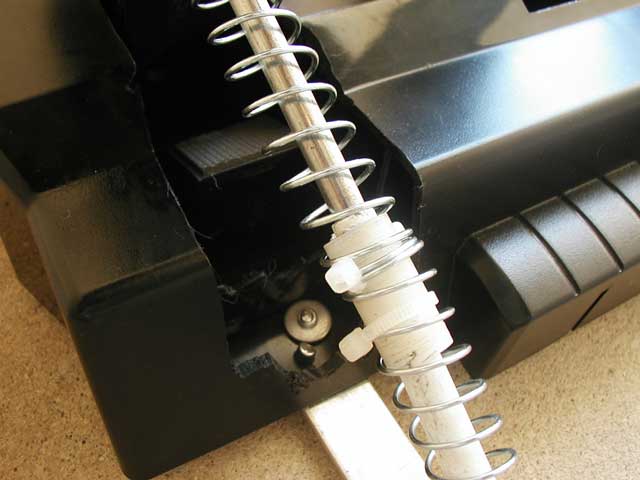
detail of "slider"
|
In the middle of the spring (actually, where the two springs meet in the middle) is a 1" long nylon bushing. It's inside diameter (I.D.) was originally 1/4", but I drilled it out to a little over 5/16" to make a loose fit over the the Bic pen tube. This slider (above and below) serves two purposes: it keeps the spring centered around the guide tube, and prevents the end of the Bic pen tube from catching on the inside the spring coils as the throttle pedal moves (inside the throttle spring, there's also an additional cardboard cylinder to accomodate the larger throttle springs). If you compare the "compression spring assemblies" photo above (click it to see an larger view) and the "full throttle" images below, you can see that this slider (anchored to the spring by nylon wire ties) moves from the top end of the Bic tube at full-closed throttle to about half-way down at full open throttle. At the top end of the spring, the 1/4" nut which jams the shaft to the top yoke also serves to keep the spring centered.
 |
 |
|
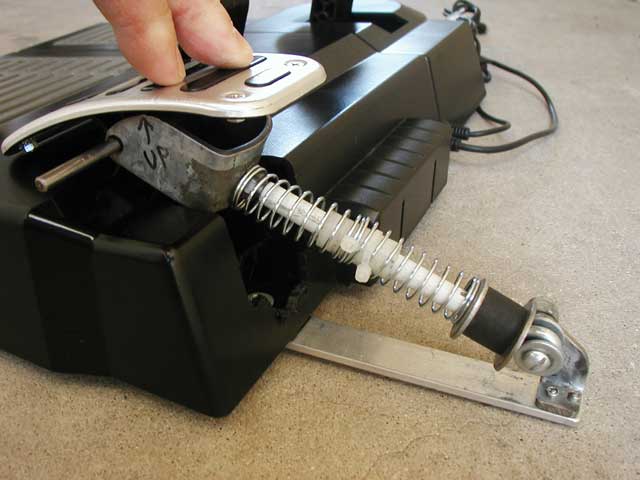
assembly at full throttle (prototype)
|
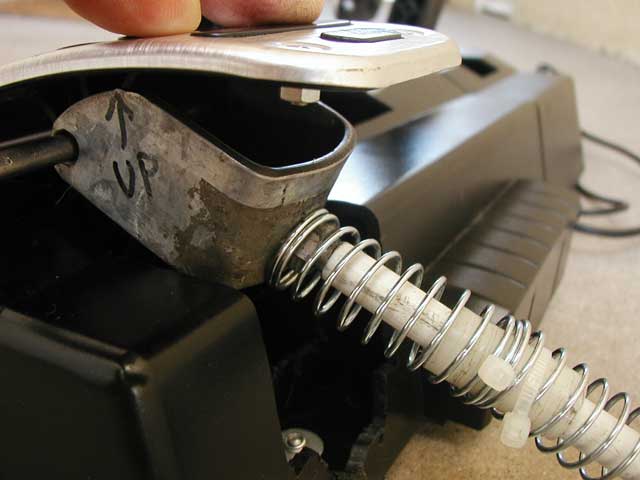
detail of top link at full throttle (prototype)
|
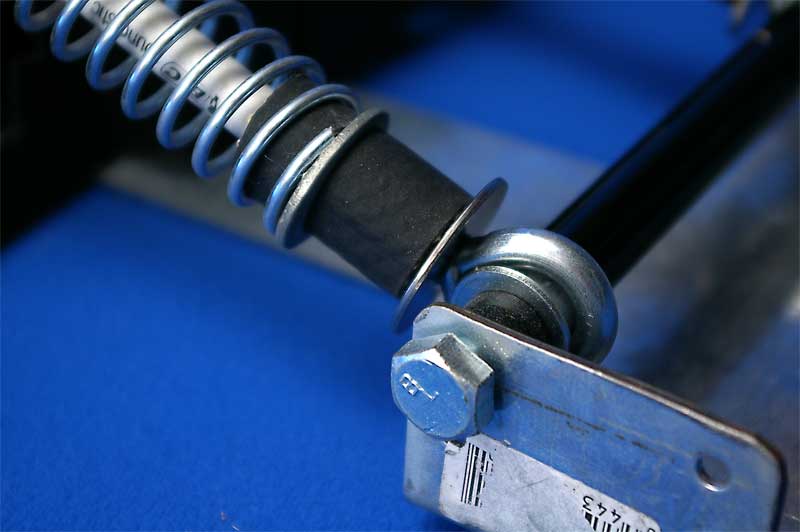
The top yoke was fabricated from some 1" x 1/8" steel bar stock I had around. The yoke must not physically interfere with the pedal face, pedal arm or the case for its entire travel. The guide shaft is made from a 1/4" bolt (it has 6" of unthreaded rod, I don't recall the stated length). At the yoke end, a 1/4" nut is first threaded all the way to the end of the threads (and retained by a thread-locking compound), then the yoke is clamped against this first nut by a second nut. The lower end of the guide shaft is where the bolt hex head was originally - the bolt head has been cut off and the end rounded and smoothed to slide back and forth within the pen tube with no resistance. When the pedal is at it's highest point, there needs to be adequate guide shaft within the guide tube to serve as a suitable guide - I think I've got from 1" to 1.25". The excess thread length at the yoke end was cut off to prevent interference with the pedal. The shape of the yoke proved tricky, as I was determined to keep its entire 1" width for strength. When I later crafted the brake pedal yoke (see "detail of brake pedal yoke..." below), I made a much leaner yoke after realizing that the throttle yoke was unnecessarily robust. The throttle would have been fine with the lighter brake yoke design.
A screw eye is glued into the end of each guide tube using epoxy (see "detail of lower spring mounting eye" below) to serve as a lower spring mounting eye. Because this joint is under compression, glue adhesion isn't a significant issue, it's mostly to keep it wobble-free and hold the bits together during assembly. Small fender washers serve as spring seats so the springs have a square surface to bear their loads.
 |
 |
|
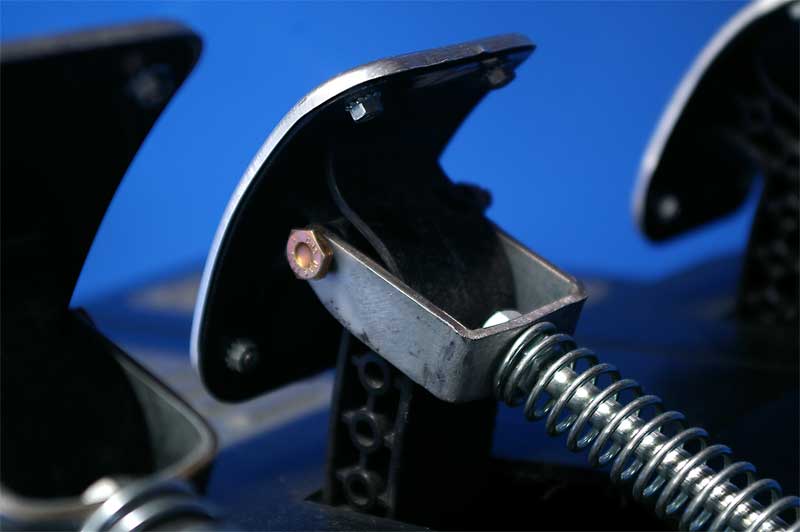
detail of brake pedal yoke and pivot pin
|
detail of lower spring mounting eye
|
In the image above left, a 3/16" bolt is inserted through an existing molded lateral tube through the pedal arm as a top pivot pin.
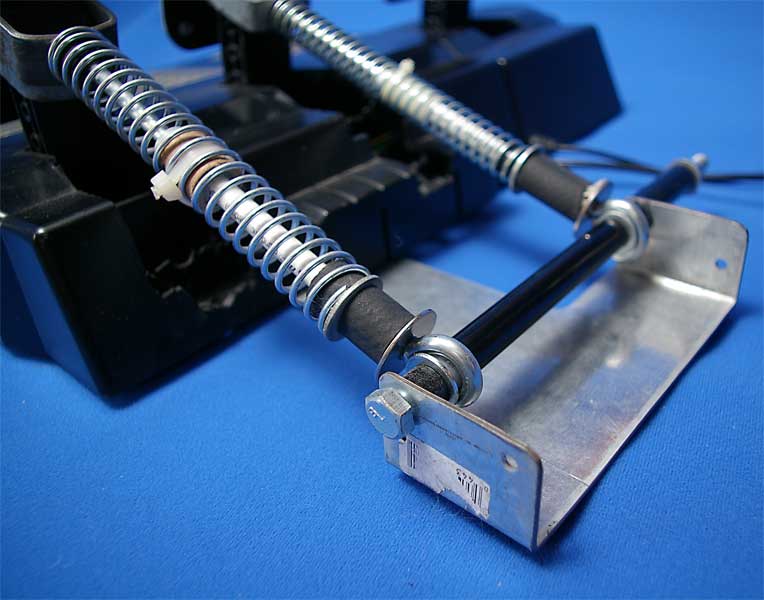
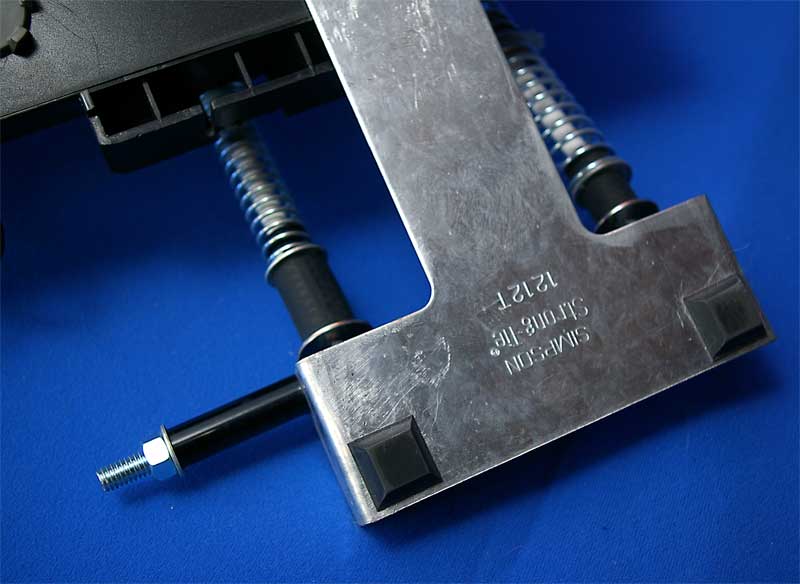
For the bottom spring bracket, I found a galvanized steel "strap-tie" (used to augment lumber joints in construction) in the hardware store and decided to design around it. This virtually eliminated cutting (except for a small notch cut as a relief for a service port in the bottom of the ALPP) and required only two right-angle bends. The spring mount is pop-riveted to the bottom of the pedal base (see photo, below left). Two holes drilled into the upturned "wings" of the steel serve to locate an 8" long, 5/16" bolt, which serves as a common lower pivot shaft for throttle and brake springs. Some plastic pipe I had around serves as spacer material to precisely position the bottom pivots of both pedal springs. In the "lower pivot shaft detail" image below right, you can see the shiny black plastic tubing is cut into four pieces: two very short pieces between the lower spring mounting eyes and the "T"-shaped steel bracket; a long piece between the two mounting eyes; and another long piece to compensate for the fact that the bolt was too long.
 |
 |
|
bottom spring bracket attachment detail
|
lower pivot shaft detail
|
The final result works perfectly. The increased spring stiffness is just what I want for sim driving, where pressure against the driver's foot must substitute for real-world acceleration cues on the driver's body and inner ear. Together with the Act Labs pedals' longer travel, this is exactly what I want in sim pedals.
I'm extremely pleased that I'll no longer have to concern myself with broken springs.
A Better Alternative
In January of 2007 I purchased a Logitech G25 Racing Wheel. Though the steering mechanism isn't as smooth as the Logitech Wingman Formula Force, its 900-degrees of turning lock was much too compelling, and I never returned to the Logitech Wingman Formula Force and these Act Labs Performance Pedals which I'd spent so much effort improving. Five years later, the G25 continues to serve well, with the exception of a failed reverse switch (which was remedied with a replacement shifter). I wrote a this long-term review of the Logitech G25 in 2008.
Contact
 |
All contents Copyright 2004 Ellsworth Chou |
|